If you’ve ever spent time around manual transmission vehicles, you know there’s a unique satisfaction in shifting through gears smoothly—when the clutch engages just right, and the car moves with that precise, deliberate feel that automatic transmissions can never replicate. But that satisfaction only lasts if the manual transmission parts you install are fitted correctly, because even a small mistake during installation can turn a straightforward job into a costly repair. As a manual transmission parts supplier who’s worked with independent mechanics, weekend gearheads, and small repair shops for over a decade, I’ve seen firsthand what happens when someone skips a step or cuts corners on installation. Today, I’m breaking down the process of installing new manual transmission parts the right way—steps that will save you time, money, and the headache of a drivetrain that won’t behave. Manual Transmission Parts
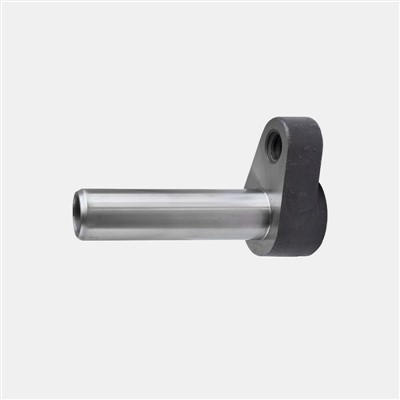
Let’s start with the most critical, and most overlooked, step before you even touch a single part: preparing. Too often, people pop open the old transmission, yank out the worn parts, and immediately bolt in the new ones without pausing to assess the rest of the system. That’s a recipe for failure. Manual transmissions don’t exist in a vacuum—they work with the clutch, flywheel, input shaft, and release bearing. Before you order new parts, do a full inspection of your entire drivetrain. If your flywheel has deep grooves or heat cracks, replacing just the clutch disc will only lead to premature wear on your new parts. If the throwout bearing is noisy or binding, that’s another part you should swap at the same time, not save for later. As a supplier, I always recommend that my customers provide their vehicle’s VIN when ordering, and share photos of any worn parts from their teardown—this lets me make sure they get the right parts for their specific make and model, and it also gives me a chance to flag additional parts they might need to replace to avoid future issues. I once had a customer who ordered a new clutch kit and only replaced the disc and pressure plate, skipping the flywheel resurfacing. Three months later, he called me upset saying his new clutch was slipping. When we looked at the photos he sent, the flywheel’s grooves had eaten into the new disc, and he ended up having to replace the clutch a second time. That’s a mistake I don’t want anyone to make, which is why preparation is non-negotiable.
Next, when you’re actually handling the new parts—whether it’s a clutch kit, synchronizer rings, bearings, or gear set—you need to treat them with care. Manual transmission parts are precision-engineered, with tolerances measured in thousandths of an inch. Even a tiny speck of dirt, a scratch on a gear tooth, or a smudge of grease on a friction surface can throw off the entire installation. I’ve seen mechanics drop a synchronizer ring on the floor, brush off the dust, and pop it into the transmission—only to have it fail within a week because the edge was nicked. Before installing any new part, wipe it down with a lint-free cloth and fresh transmission fluid, not the old dirty fluid you drained out. For friction parts like clutch discs, never touch the friction surface with your bare hands—the oil from your skin can cause the clutch to slip once installed. If you need to set a clutch disc down, use the plastic packaging it came in, or lay it on a clean, flat workbench. Even small, inexpensive parts like snap rings or dowel pins should be sorted and kept in labeled bins to avoid losing them mid-job; there’s nothing more frustrating than finishing half the installation and realizing you can’t find the right snap ring.
Now, let’s get into the specific steps for installing the most common (and most critical) manual transmission part: a clutch kit, since that’s what most people tackle when they’re working on their transmission. First, you’ll need to remove the old transmission (unless you’re doing an in-situ clutch replacement, which is only possible for some front-wheel-drive vehicles). Once the transmission is out, inspect the flywheel as I mentioned earlier. If it’s resurfaceable, take it to a machine shop to get it milled flat and smooth—this ensures even contact with the new clutch disc. If it’s too badly damaged, replace it with a new or aftermarket flywheel, and again, reach out to your supplier if you’re unsure which option is right. Next, fit the clutch disc onto the input shaft, and use an alignment tool to center it on the flywheel. This is another step that’s easy to mess up, especially for beginners. If the disc is off-center, you won’t be able to bolt the transmission back to the engine, and forcing it will bend the input shaft or crack the clutch disc. I recommend using a clutch alignment tool that’s specific to your vehicle; many clutch kits include one, but if you need a replacement, I can point you to the right part. Once the disc is aligned, bolt the pressure plate to the flywheel in a crisscross pattern, tightening the bolts incrementally to the manufacturer’s torque specification. Don’t just tighten one bolt all the way first—that will warp the pressure plate and throw off the clutch’s engagement. Torque specs are there for a reason, and they vary by part, so never guess this step.
Moving on to internal transmission parts—like synchronizer rings, bearings, and gear sets—these require even more precision. Synchronizer rings are what allow you to shift gears smoothly by matching the speed of the input and output shafts before the gear engages. Over time, their friction surfaces wear down, which causes grinding when shifting. When installing new synchronizer rings, make sure they fit snugly into the grooves on the hub, and that the beveled edge faces the right direction. I’ve had customers mix up old and new synchronizer rings, or install them backwards, leading to immediate grinding when shifting. For bearings, always use a bearing press to install them—don’t hammer them on with a mallet, as that can crack the bearing or damage the housing. When installing a new mainshaft or countershaft, double-check the end play (the amount of movement along the shaft) with a feeler gauge. End play that’s too loose or too tight will cause noise, vibration, or premature gear wear. Again, your supplier should be able to provide torque specs and tolerance limits for the parts you’re installing, so don’t hesitate to ask.
One of the most common mistakes I see is not using the right lubricant. Manual transmissions require specific fluid—using automatic transmission fluid or the wrong gear oil can cause excessive wear on bearings, synchronizer rings, and gear sets. When you install new parts, always fill the transmission with the fluid recommended by the manufacturer, and change it after the first 500 miles of driving to flush out any small metal shavings from the break-in period. For clutch parts, a light coating of high-temperature grease on the input shaft splines and the contact points of the release bearing is enough—don’t over-grease, as excess grease can get on the clutch disc and cause slipping.
After you’ve installed all the parts, it’s time to reassemble the transmission and bolt it back into the vehicle. Before you lower the transmission, double-check that all snap rings, bolts, and seals are in place, and that there are no tools or parts left inside the housing. Once it’s bolted up, bleed the clutch system if it’s a hydraulic setup, or adjust the clutch cable if it’s a mechanical one. This step is crucial—if the clutch isn’t properly bled or adjusted, it won’t disengage fully, leading to grinding when shifting or premature clutch wear.
Now that the installation is done, you need to break in the new parts correctly. Most manual transmission parts, especially clutch kits and synchronizer rings, need a break-in period to seat properly. For the first 500 miles, avoid hard shifts, rapid acceleration, or riding the clutch. Let the clutch engage smoothly, and don’t slip the clutch excessively when starting from a stop. This will ensure that the new parts wear evenly and last as long as they should.
At the end of the day, installing new manual transmission parts correctly isn’t rocket science, but it does require attention to detail, patience, and a willingness to do the prep work. The biggest mistake anyone can make is rushing through steps to save time—because that almost always leads to more time (and more money) spent repairing the same issue down the line. As a manual transmission parts supplier, my job isn’t just to sell you parts—it’s to make sure those parts work when you install them. Whether you’re a professional mechanic or a weekend warrior tackling your first transmission job, if you have questions about part compatibility, torque specs, or installation best practices, don’t hesitate to reach out. We’re here to help you get the job done right the first time.

If you’re ready to order manual transmission parts or need guidance for your specific project, please contact our team to discuss your needs and get personalized support.
Output Shaft References:
- Automobile Association (AA). "Manual Transmission Clutch Installation Best Practices." AA Motoring Advice, 2023.
- Society of Automotive Engineers (SAE). "Tolerance Specifications for Manual Transmission Components." SAE International, 2022.
- National Institute for Automotive Service Excellence (ASE). "Manual Transmission and Driveline Repair Certification Study Guide." ASE, 2021.
- Automotive Parts Rebuilders Association (APRA). "Proper Handling and Installation of Manual Transmission Bearings." APRA Technical Bulletin, 2022.
Taizhou Liuhuan Machinery Co., Ltd.
As one of the most professional manual transmission parts manufacturers and suppliers in China, we’re featured by quality products and good service. Please rest assured to buy customized manual transmission parts made in China here from our factory. For quotation, contact us now.
Address: Xinyuan Industrial Zone, Damaiyu Street, Yuhuan City, Zhejiang Province,China
E-mail: tzlhmachining@gmail.com
WebSite: https://www.tzlhmachining.com/
