If you’ve ever held a custom 3D-printed tool, a prototype part that fits perfectly into a tight engineering assembly, or even a quirky home decor piece you picked up at a maker fair, there’s a good chance it came from FDM 3D printing. As someone who’s spent the last seven years running an FDM printing supply business—working with everyone from startup teams testing a new medical device to small-scale manufacturers replacing expensive injection-molded parts—I’ve fielded the same question a hundred times: “How does this actually work, beyond just melting plastic and stacking it?” It’s not rocket science, but it’s way more precise than most people assume, and understanding the basics goes a long way to seeing why FDM is still one of the most versatile, accessible manufacturing methods on the market today. FDM Printing

Let’s start with the parts that make FDM run, because if you don’t know what each component does, the process will feel like magic. First, there’s the spool of filament—our supplier partners with material makers who refine everything from standard PLA to high-performance ABS, PETG, and even specialty materials like carbon-fiber-reinforced nylon or medical-grade thermoplastics. This filament is basically a long, thin strand of plastic, fed through a metal tube called a bowden tube (or sometimes a direct drive extruder, depending on the machine) into the printer’s extruder assembly. That extruder has two core jobs: pull the filament from the spool, and heat it until it’s soft enough to squeeze out into a consistent stream. The heating element inside the extruder, called a hot end, gets calibrated to the exact melting temperature of whatever material you’re using—PLA melts around 190°C, ABS needs around 230°C, and our team often adjusts that setting by 5 or 10 degrees depending on humidity or the filament’s batch, because even small shifts throw off print quality.
Next is the print bed, the flat surface the part sits on. The bed is heated too, though usually to a much lower temperature—PLA beds are often set to 60°C, while ABS might go up to 110°C. That heat isn’t just for comfort; it prevents the first layer of your part from cooling too fast and warping, which is the #1 complaint we hear from new FDM users. We recommend bed adhesives like hairspray or PVA glue sticks for general printing, but for high-temperature materials, we work with our clients to get specialized build plates that use a textured surface or PEI coating to keep parts from shifting mid-print. Then there’s the motion system, which is responsible for moving the extruder and print bed with pinpoint accuracy. Most FDM printers have either a Cartesian system (where the extruder moves along X and Y axes, and the bed moves along Z) or a CoreXY system, which is faster and more precise for larger prints. Either way, the tolerance is tiny—down to 0.1 millimeters, so a misaligned belt or a sticky bearing can ruin a part, which is why we include routine maintenance guides with every machine we sell.
Now, the actual process unfolds in three key stages, starting with pre-processing. This is where the magic of turning a digital design into a physical part happens, and it’s the step most first-time users get wrong. You start with a 3D model, usually a CAD file from an engineer, designer, or hobbyist. That model needs to be “sliced” — meaning software like Cura, PrusaSlicer, or our preferred custom slicing tool for industrial clients cuts the model into hundreds or thousands of horizontal layers, each 0.05mm to 0.3mm thick depending on how detailed you want the part. The slicer also adds support structures where needed—overhangs that angle more than 45 degrees, areas that would sag without extra material to hold them up. Supports are a critical part of FDM, and our team often advises clients to use a water-soluble support material like PVA for complex parts, so they don’t have to chisel away plastic with a knife and risk damaging the finished part. Once the slicer is done, it exports a G-code file, which is a list of step-by-step commands for the printer: move to X10 Y20 Z0.2, extrude 10mm of filament at 200°C, wait for the next command.
The second stage is the print itself, which runs layer by layer, moving at speeds between 20mm per second for fine details and 100mm per second for bulk parts. The first layer is the most important: the extruder squeezes a thin bead of molten filament onto the heated bed, pressing it down to adhere. For the next layer, the printer moves the extruder up by one layer height, deposits a new bead of filament that locks into the grooves of the layer below, and repeats this process, building the part from the bottom up. I’ve watched dozens of prints go from a flat, messy first layer to a fully formed part over hours—there’s something satisfying about that slow, steady build, because you can actually watch the piece take shape, one tiny strand at a time. But it’s not just stacking; the filament cools almost immediately after being deposited, so each layer is rigid enough to support the next, no extra curing needed for standard thermoplastics.
The third stage is post-processing, which is where a lot of the final quality comes in. For most hobbyist prints, post-processing is simple: peel off supports, sand any rough edges, and call it done. But for industrial parts, it’s more involved. We work with clients who do vapor smoothing for ABS parts to make them water-tight or increase their strength, or tumble small parts in a barrel of media to remove layer lines. For medical or food-grade parts, we follow strict cleaning protocols to remove any residual support material or filament dust. It’s easy to overlook post-processing when you’re excited about getting a print, but as a supplier, we’ve seen parts fail in testing because of a skipped sanding step or leftover support material that caused a stress point.
Now, why does this matter for our clients? FDM isn’t the right fit for every manufacturing job, but it fills a unique sweet spot that’s hard to replicate with other methods. For startups testing a prototype, FDM is fast and low-cost—you can go from a CAD file to a physical part in a matter of hours, compared to weeks for injection molding tooling. For small to medium production runs, FDM cuts down on waste: unlike injection molding, which requires custom molds that can cost thousands and create scrap when a mold breaks, FDM only uses the exact amount of filament you need, and you can modify designs on the fly without new tooling. We supply printers and materials to everything from aerospace teams making bracket prototypes to school makerspaces teaching engineering, and each use case relies on the core strength of FDM: its accessibility and flexibility.
That said, FDM has its limitations, and being a supplier means being honest about those with our clients, not just selling them a machine. High-precision parts that need tolerances tighter than 0.05mm are usually better suited for SLA or CNC machining. Large production runs, like 10,000 identical parts, are more cost-effective with injection molding. But for custom, low-volume, or complex parts, FDM is unmatched. We recently worked with a small medical device startup that needed 50 custom housings for a portable blood monitor—each one slightly different based on the client’s hand size. FDM let them adjust the design for each print in 10 minutes, no new tools, and the parts were strong and sterile enough for clinical trials. That’s the value of understanding how FDM works: when you know the process, you can leverage its strengths and avoid its pitfalls.
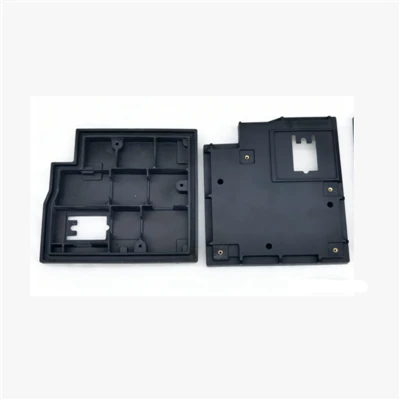
If you’re looking to get started with FDM printing, or you’re tired of working with unreliable suppliers who cut corners on materials or machine maintenance, we’re here to help. We don’t just sell printers—we provide training, material recommendations, and ongoing support, so whether you’re a hobbyist with a home setup or a manufacturing manager scaling a production line, you get the most out of your FDM process. Contact our team today to discuss your project, request a material sample, or book a demo of our latest industrial FDM printers. We’d be happy to walk you through how FDM can work for your specific needs, no jargon, no pressure.
Injection Molding References
- Gibson, I., Rosen, D. W., & Stucker, B. (2015). Additive Manufacturing Technologies: 3D Printing, Rapid Prototyping, and Direct Digital Manufacturing. Springer.
- Calvert, P. (2001). Solid Freeform Fabrication of Functional Materials. Materials Today, 4(1), 38-44.
- Ngo, T. D., Kashani, A., Imbalzano, G., Nguyen, K. T., & Hui, D. (2018). Additive Manufacturing (3D Printing): A Review of Materials, Methods, Designs and Applications. Composites Part B: Engineering, 143, 172-196.
- Prusa Research. (2022). The Complete Guide to 3D Printing with FDM Technology. Prusa Knowledge Base.
- American Society for Testing and Materials. (2021). Standard Guide for Additive Manufacturing – Fundamental Principles and Terminology (ASTM F2792-21). ASTM International.
Dongguan Xinchuan Precision Manufacturing Co., Ltd.
As one of the most professional fdm printing manufacturers and suppliers in China, we offer a quick lead time for customized orders. Please feel free to buy precision fdm printing made in China here from our factory. Contact us for quotation.
Address: #16 Gangjian Road, Changping Town, Dongguan City, Guangdong, China. 523000
E-mail: FreeQuote@xcprecision.com
WebSite: https://www.xcprecisions.com/
